


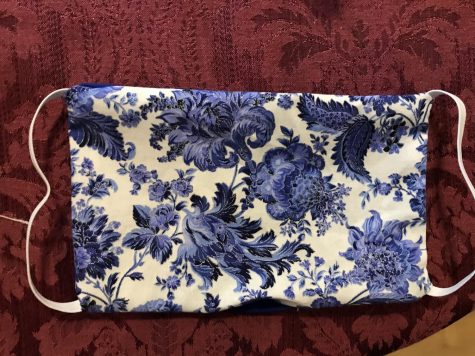
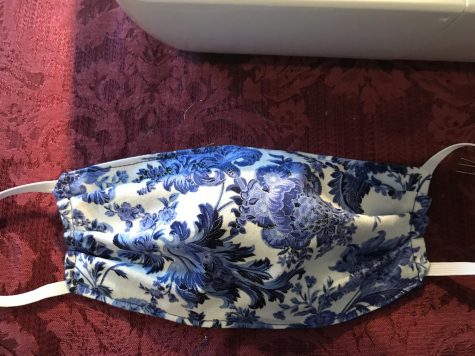
Hand-sewn masks for hospitals
Renee Gould ‘22 talks about over-extended hospitals that are rapidly running out of medical-grade face masks and explains how to make your own at home and get involved during the COVID-19 lockdown
Hospitals in Seattle, where there have been 1,996 infections and 95 deaths due to COVID-19 as of Sunday started asking volunteers to make face masks out of fabric as they rapidly ran out of medical-grade ones. Luckily, volunteers came through and the crisis has been mostly curved. The masks are reusable, and permitted for use under the FDA, though they are not as good as medical-grade ones. Soon after, hospitals in Illinois started asking for similar donations, and now the Blue Cross and Blue Shield of Minnesota and Allina Health is asking for the same kind of help. As well, the design listed here is a CDC compliant design that has been approved for use by area providers. The site linked also will provide free fabrics and other materials if you need it, and has resources further explaining how to make face masks, including a video.
If you can sew and would like to coordinate, please contact me at (319)499-7402 or [email protected], or if you cannot sew but would still like to help, you can donate to Sew Good Goods, which is a nonprofit.
The following are the steps I used to make the masks, however this is not the only possible method and for a full-length video explaining it, I recommend watching through Deaconess Hospital’s video.
Step 1:
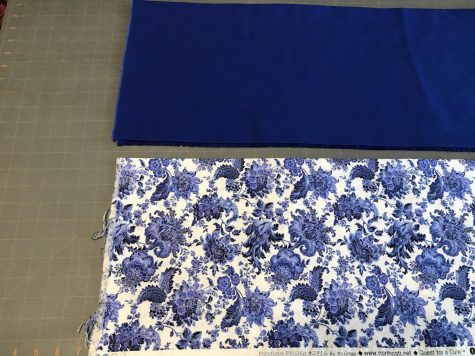
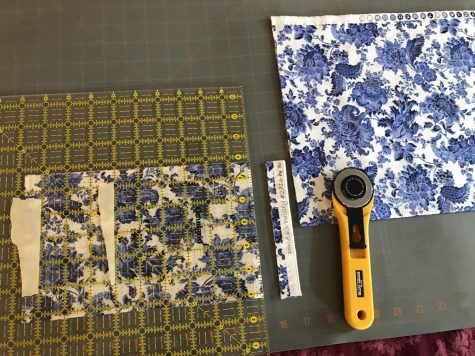
Iron out one or two fabrics. Here, I’m using two types of closely-knit 100% cotton fabric, the blue-white one to be the front of the mask and the plain blue to be the backing. As most fabrics are about 40” across the frayed edge, after ironing it out completely, fold once and iron again, paying extra attention to the crease. Repeat until the fabric is about 10” across the frayed edge. This will help to speed up cutting.
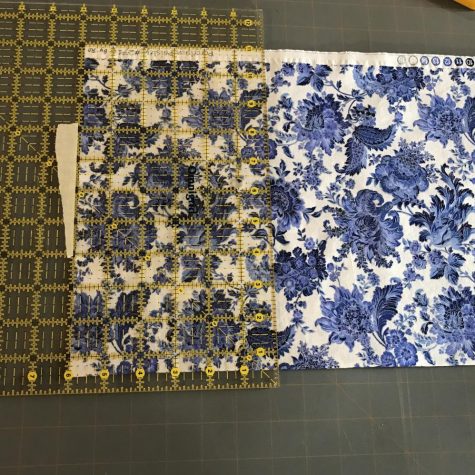
Step 2:
Here I’m using a cutting board and a rotary cutter, however scissors can work just as well. On my square ruler, I’ve placed two pieces of tape, one marking 6” and the other marking 9” as those are the wanted dimensions of the mask. As it’s already about 10” across, we’re going to cut to 6” first. As well, I made sure to trim the frayed edge straight.
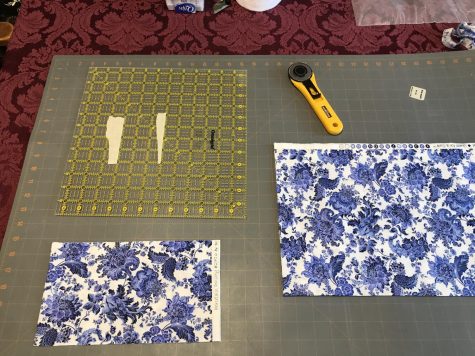
Step 3:
You can cut a few of these 6” by about 10” pieces all in a line, with each of the folded rectangles able to give you four pieces of 9” by 6” rectangles.
Step 4:
Next, loosely measure to cut off the excess. As long as the resulting piece is over 9”, be sure to cut off all of the edge selvage first, and check through your four layers to make sure that you’re cutting all of it off. This is mostly for aesthetic, so it’s not completely necessary if your piece is too short to remove the selvage.
Step 5:
Cut off the selvage and make sure your cut is clean.
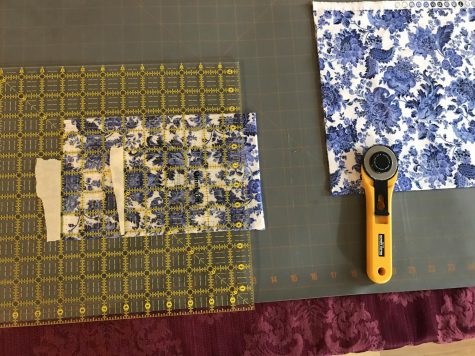
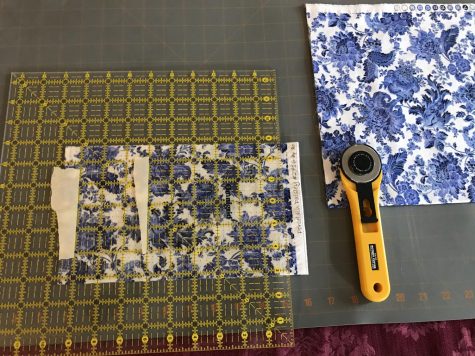
Step 6:
Here, I’ve flipped around my piece of fabric, so the folds are facing out of the square ruler. This time, measure as close to exactly 9” as possible and remove all excess. If your piece of fabric is only barely 9” before this step, cut off only the fold, as this will separate it into the four rectangular pieces of fabric.
Step 7:
Cut and make sure the line is clean. If you’re using scissors, I’d suggest cutting only the fold at first and then cutting down to 9” one layer at a time to keep the lines neat.
Step 8:
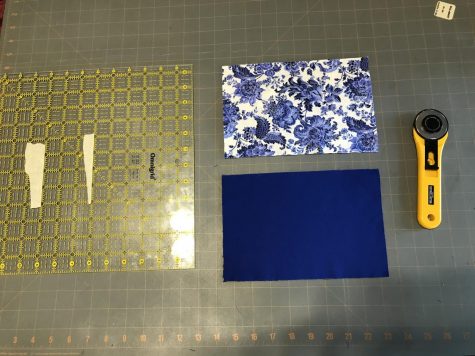
Repeat steps two through seven with your other color of fabric if applicable. This should give you a total of eight separated rectangles, or four if you’re only using one color.
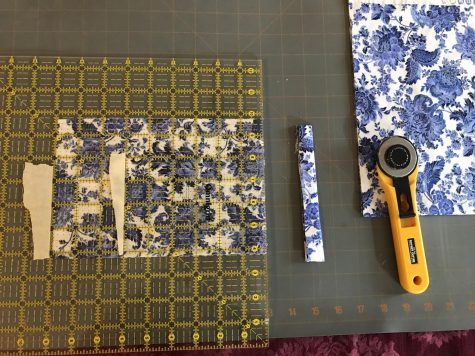
Step 9:
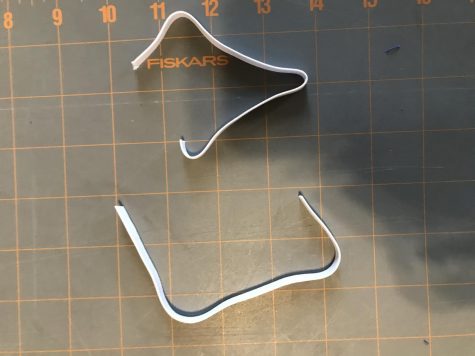
Cut elastic to 7”. The elastic should be around ¼” wide, or as close as possible. Having folds in it is fine, as seen in the picture, but make sure it’s flat elastic as circular options are much harder to use.
Step 10:
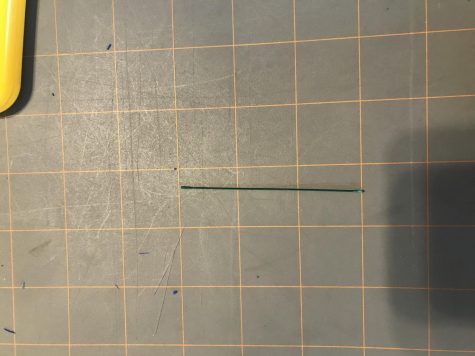
Cut a piece of wire to 3”, here I’ve used floral stem wire as it’s fairly easy to cut, bendable, and not too stabby. This will go in as a makeshift nose piece to make sure that the mask fits the face better.
Step 11:
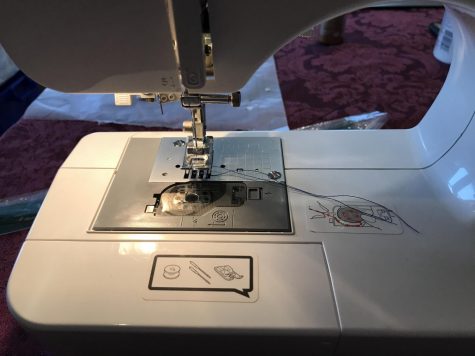
Thread your machine will an appropriate thread color. Here I’m just using a simple dark blue. As well, make sure that your machine is in working order before starting, particularly if you haven’t used it recently. Please note that you will have to do many backstitches and be able to control the needle slowly, meaning that a hand-turned way to stitch and a covenant way to backstitch will make the entire process much easier.
Step 12:
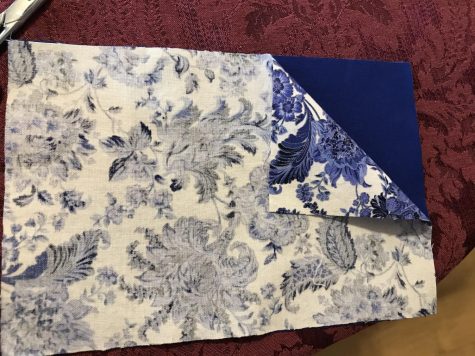
Using the two fabrics, place them so that they’re right side in. Meaning that the nicer, non-faded sides of the fabrics are not visible on the outside. In the photo I flipped up the top layer to showcase the difference between the right side and the faded side.
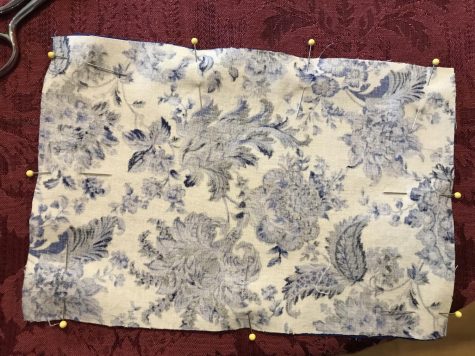
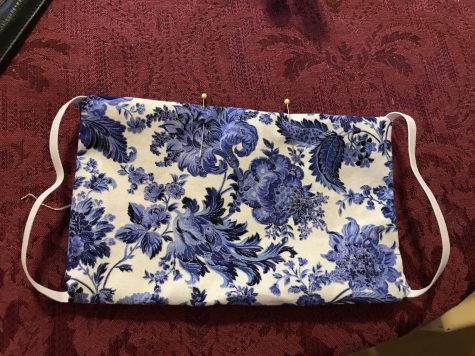
Step 13:
Pin all the way around the two rectangles, so that they’ll be held together. As well, in the middle of one of the 9” sides, make sure to mark out a place for a hole to be left, as this will allow you to flip the mask right side out and put in the wire.
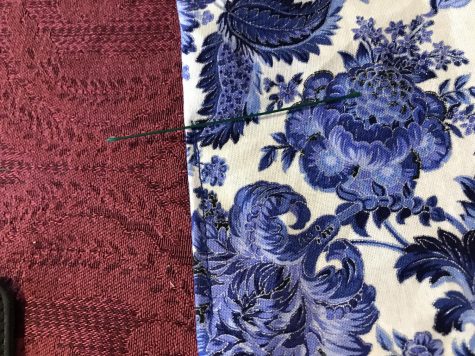
Step 14:
Start to sew around almost the entire thing, backstitching at the start, leaving only the previously marked hole unsewn. Leave a seam allowance of about ⅝”, though a ¼” seam allowance also works if your machine doesn’t have ⅝” clearly marked, with ¼” being the right edge of the foot. Be sure to pause sewing just before the corners.
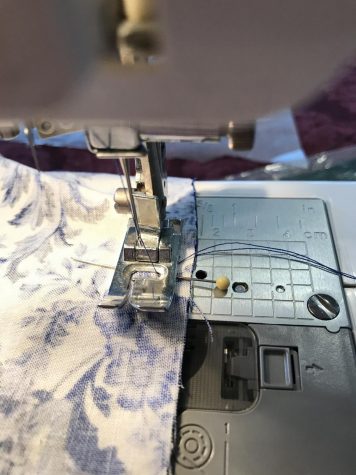
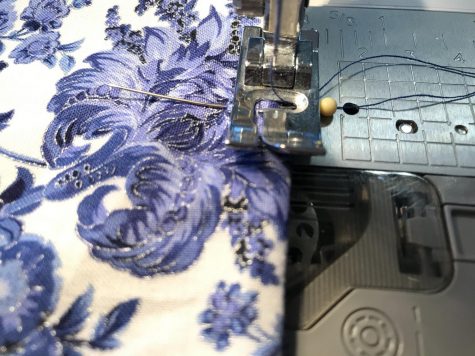
Step 15:
Once at the corner, thread the elastic in between the two pieces of fabric, as you want the elastic visible once you turn the mask right side out. Putting it at an angle works best. Sew over it and make sure you don’t catch it as you finish sewing along the 6” side. Using the same piece of elastic as on the other 6” corner (please make sure the elastic stretches along the 6” sides from corner to corner and not along the 9” corner). Repeat for the other 6” side. This means you’ll have to pause at all four corners. Backstitch at the end.

Step 16:
At the of this stitching, your rectangle should look like this, with the elastic sewn in, in the middle of the two rectangles, though those should also be sewn together. There should be a hole in the middle of one of the 9” sides, with backstitching on both the beginning and end.
Step 17:
Flip the entire thing right side out. The elastic should stick out like so. In all the following steps, watch the elastic to make sure you don’t accidentally sew it to the mask.
Step 18:
Pin where the small ‘pocket’ for the wire will go. It should be about as long as the wire itself, and in the 9” side that does not contain the hole.
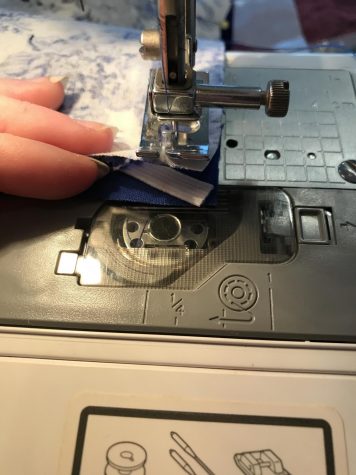
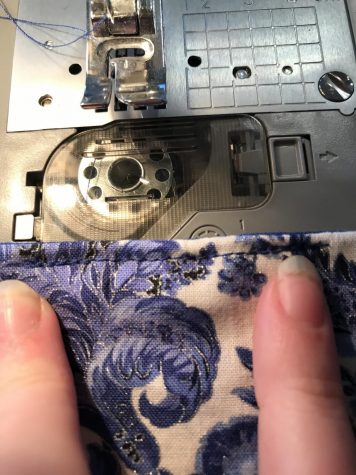
Step 19:
Sew between the pins, making sure to backstitch at the start and end. The seam allowance should be about ⅛”, or just to the right-most of the small oval inside the foot. If this is not well-marked on your machine, estimate by keeping your stitches just barely on the mask.
Step 20:
Next you’ll want to insert the wire into the pocket you created through the opening. Try to keep from bending the wire too much during this step.
Step 21:
I marked this just with my fingers in the photo, but you’re going to sew from the edge of the mask to the ends of the pocket, to help seal the wire into the pocket. Make sure to backstitch and go over this spot three or so times to make sure it’s secure.
Step 22:
Though it’s hard to see in the photo, I have sewn in the two necessary lines to keep the wire in the small pocket. Ideally, these lines should be hard to see and not too bulky, meaning be careful of going over them too many times.
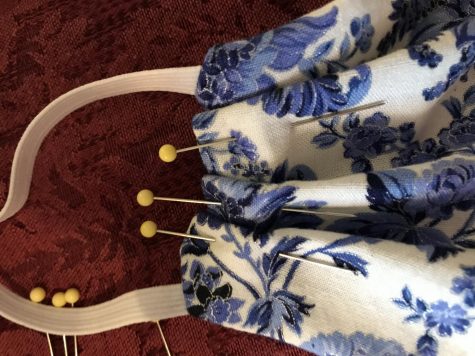
Step 23:
Pin the three pleats on one of the 6” sides. I’d suggest spending some time making sure these are all roughly equal and fairly easy to replicate. Be careful of stabbing yourself with pins. As well, make sure you can pull it slightly to make the three pleats line up roughly straight, as this is easier to sew around than a heavily curved edge.
Step 24:
Repeat the pleats on the other 6” side. This will likely take some time and will not be totally perfect. Make absolutely certain that the pleats point the same way, which should be toward the top of the mask, where the wire is, so that if water were to run under the flaps of the pleat, it would move away from the top.
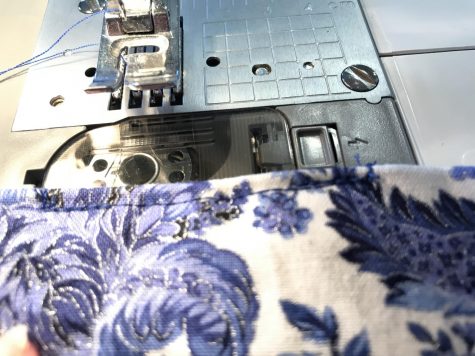
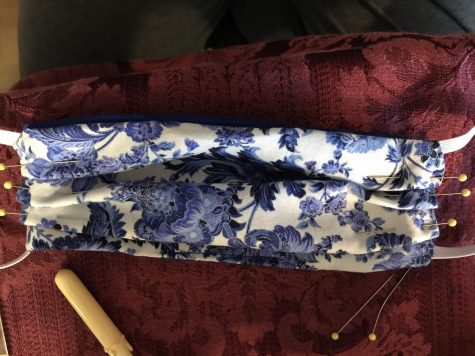
Step 25:
Sew all the way around the mask, backstitching as the start and end. The seam allowance should be about ⅛”, like the pocket for the wire. Be careful of the elastic during this step, as mistakes will result in the elastic being sewn to the mask, and you forced to rip out all of your work. As well, leaving a larger seam allowance, of about ¼”, is encouraged as this part is much thicker than anywhere else, and being too close to the edge could mean that the pleats in the backing aren’t properly sewn down or missing the pleat entirely.
Your donation will support the student journalists of West High School. Your contribution will allow us to purchase Scholarship Yearbooks, newsroom equipment and cover our annual website hosting costs.

(all) Renee Gould is a senior at West, it is their third year on staff and is currently the opinion editor for the online publication.
